
Are you one of those amazing writers for whom titles flow so freely that they title each individual chapter? If so, this tutorial is NOT for you. For those of us who use “Chapter One,” etc and use Microsoft Word, I have a handy-dandy tip.
Have you ever had to renumber chapters? Microsoft Word can do it for you. Automagically! Later you can delete a chapter heading and it renumbers all future chapters. Like without lifting a finger.
WARNING: When you delete a chapter heading, do so in the body of the document but selecting it and back spacing. Do NOT delete it from the TOC on the left (more about this handy feature below) because THAT WILL DELETE THE ENTIRE CHAPTER. And you probably don’t want that.
Open Microsoft Word (note, I use the PC version 2010 – 2019, not sure about Mac. Other versions may differ. Screenshots below are 2010.)
Create your Numbering Format
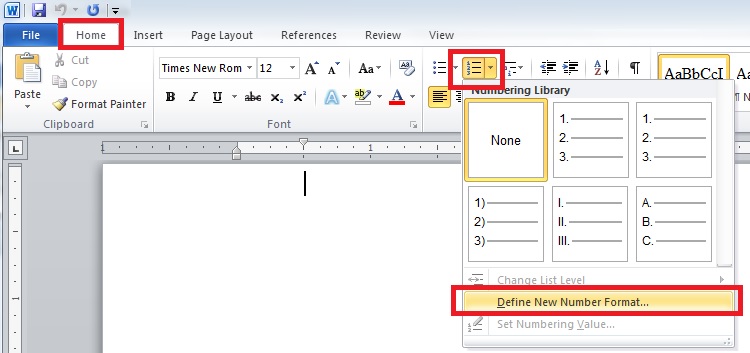
- In the HOME tab, in the PARAGRAPH section, click the down arrow next to the numbered list (1-, 2-, 3-) to open the NUMBERING LIBRARY.
- Click on DEFINE NEW NUMBER FORMAT.
- For “Number Style:” Select “One, Two, Three”
- For “Number Format”, type “Chapter” before “One”
- Click OK
Set up your Numbered Chapters as Headers
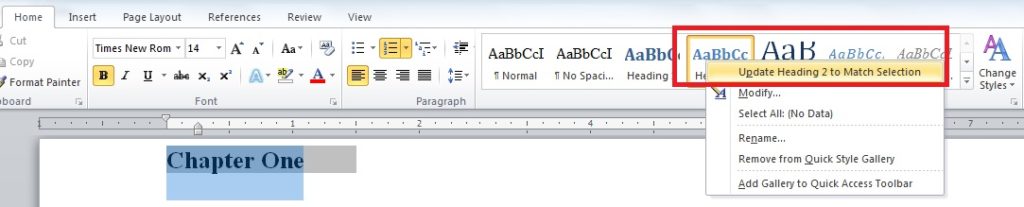
- Right click the “Chapter One” entry that has just been inserted into your document and format it as you would like. I usually make mine bold and then use Shift+Tab a couple of times to align it to the left. You can center it, change the font, or do whatever you like.
- With the “Chapter One” entry still highlighted, on the HOME tab, in the STYLES section, right click a Heading (I like HEADING 2 for Chapters), and click “Update Heading 2 to Match Selection”
- BONUS TIP – later, if you decide all of your chapter titles need to be Red, Right Aligned, and 14 PT Comic Sans font, all you have to do is right click the chapter title, make the changes, and then right click the Heading in STYLES. Update the heading and all of your chapter titles will be updated!
- When you’re ready to start a new chapter, use the Heading you’ve set up under STYLES to add a new Chapter heading.
Easy, right? But wait, that isn’t all!
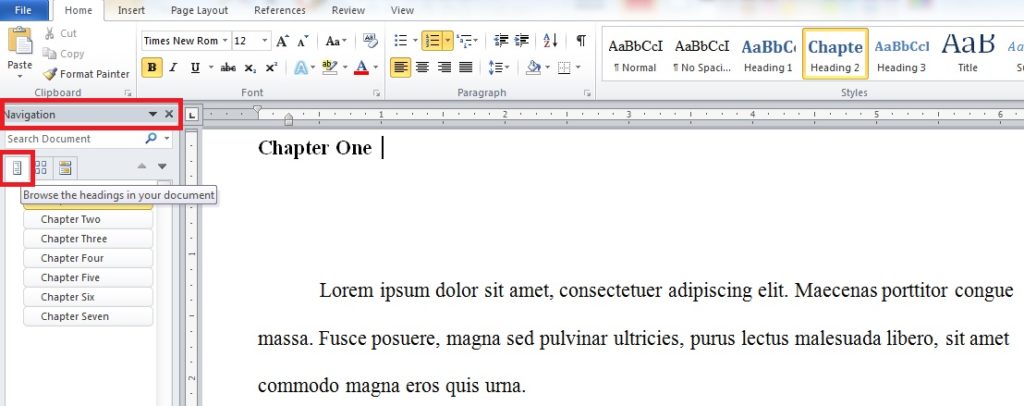
Want to jump to a chapter real quick? ALT+F opens the Navigation Pane on the left. Click on the 1st tab (Headings) to see a list of all of your Chapters and flip between them.
Accidentally set Chapter Four in August and Chapter Five in June? If you’re real brave, you can even reorder chapters using the Navigation pane but you can mess up your flow if you do this wrong. Drag chapters up and down the list and it moves the entire chapter (and renumbers them).
Remember that WARNING from earlier? If you delete a chapter header from the navigation panel, it deletes the entire chapter, just like if you reorder a chapter header it reorders the entire chapter. So, don’t do that. Unless that’s what you want.
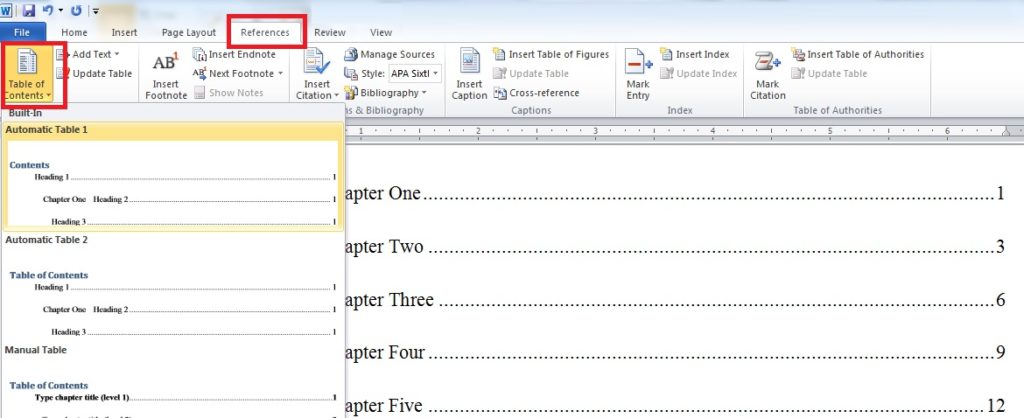
Last trick – need to set up a Table Of Contents or Index? It’s easy because you set your Chapter Numbers as Headers. Go to the REFERENCES tab and click on TABLE OF CONTENTS. You’ve got lots of options, but I usually select any table of contents with Heading 2 in it (assuming you set your chapters up as Heading 2 like I do).
Hint – setting up a Table Of Contents is an easy way to tell if your chapters are sorta balanced. I like my chapters to be between 7-14 pages long. If I’ve got several 20+ page or 5+ page chapters, I might want to break up a chapter, combine chapters, or change where they break.
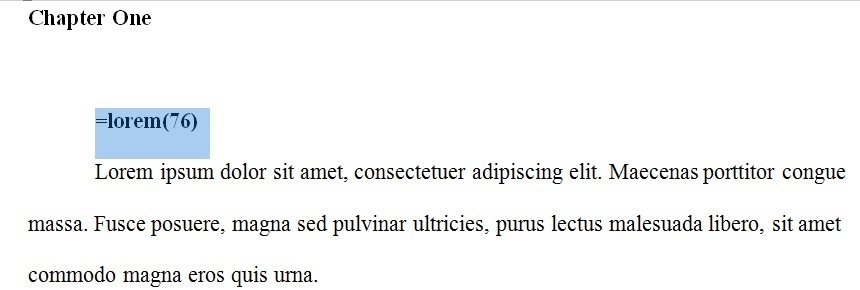
Remember when I said “Last Trick?” Good times, right? Well, I lied. If you’re ever in a position where you need to insert a whole lot of nonsense text quickly into a document like I did in the examples I used to make this tutorial, MS Word comes through for you there, too. Type =lorem() into a word doc with a number in the parentheses for how many paragraphs you want, and hit enter. VIOLA! Pages and pages of nonsense. I wouldn’t recommend you sending this to your college professor, beta readers, or publisher but it comes in handy at times.
HELPFUL HINT: Sometimes software has a mind of its own. Even Microsoft software sometimes fouls up (imagine that!!). If your Normal template gets corrupted, sometimes your automatically numbered chapters will get bungled, too (ie will show up as black boxes instead of numbered chapters). If that happens. Google the instructions for deleting and recreating your Normal.dot(x) template for your version of Word and then set up auto chapters again. Everything should start working again!
#TheWriteLife #OliviaBlacke

 Appearances")
