
In Going to the Dog Cookies (Part 1), I shared my Bark-B-Que and Pumpkin Butter dog treat recipes. And according to my puggle, they’re delicious, much better than anything I buy at the big box pet stores.
But dog cannot live on peanut butter and pumpkin, or BBQ oats and applesauce alone. When it came time to mix it up a little (that’s a baking pun. Get it? *Mix*?) I wanted to try new flavors. That’s when I discovered the joy of 2-ingredient baking. No, seriously.
Ingredient #1 – 1 1/4 cup Flour. I prefer whole-wheat flour. You can experiment with alternatives as long as they are dog safe.
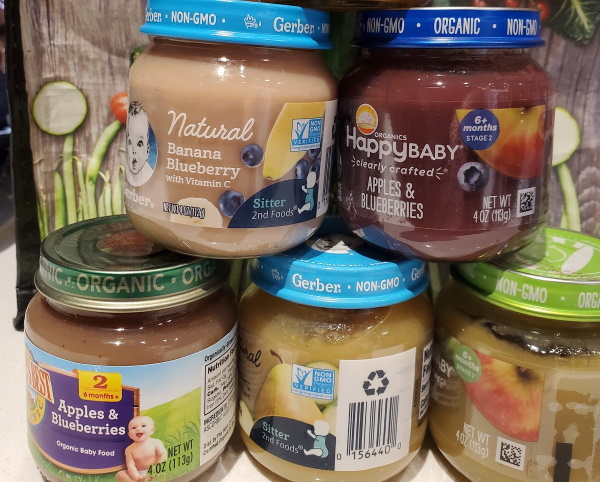
Ingredient #2 – Baby food (2 oz jar). Go crazy – there are a ton of flavors from choose from as long as you select dog safe ingredients (NO onions, raisins, or chocolate.) Pumpkin. Apple. Bean. Carrot. Sweet Potato. Fruits, veggies, and combos galore! For my first try, I went with Zucchini & Pear, Apple & Blueberry, and Spinach & Apple.
Added bonus – not only will you know exactly what goes into your dog’s treats when you make them yourself, but also your kitchen will smell GREAT while they’re baking.

Steps:
- Preheat oven to 350
- Mix 1 2oz jar of baby food with 1 1/4 cups flour. Once you scoop out all the baby food, fill the jar with a splash (just enough to cover the bottom) of water. Close the lid. Shake to get all the baby food out. Pour into the mixing bowl.
- Combine – I like using a wooden spoon. The dough should be too thick for a standard mixer.
- Roll out the dough. I sandwich the dough between two sheets of floured wax paper on top of a cutting board and then roll it out.
- Cut the dough. I like using funny shaped cookie cutters, but it’s quicker and easier to use a knife and cut out bite-sized pieces. The size, of course is relative to the size of your dog.
- Cook the cookies. Place cut outs on greased cookie sheet. Don’t worry about placing them too close together as they don’t really spread. Cook for ~15 minutes at 350.
- Remove when cooked, let cool. Package (airtight container) and store (assuming your dog hasn’t jumped up on the counter and eaten them all while they were cooling.)
IMPORTANT! There are no artificial preservatives in these cookies so the rule of three applies. Labeling the container with the date makes it easier to keep track, although it’s hard to keep them in stock long enough for them to spoil!
- 3 days on the counter in an airtight container
- 3 weeks in the fridge in an airtight container
- 3 months in the freezer in an airtight container (can serve frozen)
Have fun, and try lots of flavor combinations! Bailey the Puggle approves of all three of these flavors. Her favorite is definitely the apple/blueberry. Or the spinach/apple. Or the pear/zucchini. She’ll need to sample some more to make up her mind.
One last note: I’m a vegetarian. My dog is not. I’m no expert or veterinarian, but I don’t believe in forcing a dog to live on a vegetarian diet. The treats I make are vegan or vegetarian, depending on the recipe. My dog gets carrots as treats, as well as store-bought chicken, bacon, etc flavored biscuits. I like making these cookies because baby food is typically high in fruits and veggies and low in added sugars, and I can select ingredients I want to feed my dog as treats. She gets plenty of meaty meals. So don’t @ me.
Can’t get enough puggle? Baileycakes has her own Instagram account filled with adorable puggleness!

